
=== 目次 ===
Viewのスライドインを実装する方法
Androidアプリ開発においてViewのスライドインを実装する上でのポイントは以下の3つです。- FrameLayoutを使用する
- スライドイン対象のViewはあらかじめ見えないようにしておく
- 位置を変更するアニメーションを使用する
FrameLayoutを使用する
Viewをスライドインさせるということは既に表示されている他のViewと重なって表示させることを許す必要があります。そのような場合のViewGroupにはFrameLayoutを使用します。
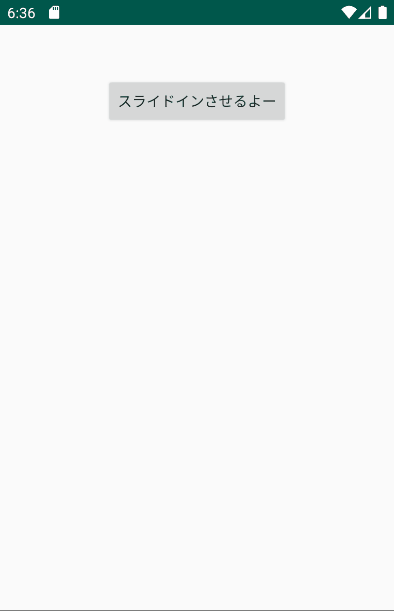
以下にスライドインさせるためのButtonとスライドイン対象のView(ここではLinearLayout)をFrameLayoutに配置したときの例を示します。
<?xml version="1.0" encoding="utf-8"?>
<FrameLayout
    xmlns:android="http://schemas.android.com/apk/res/android"
    xmlns:app="http://schemas.android.com/apk/res-auto"
    xmlns:tools="http://schemas.android.com/tools"
    android:layout_width="match_parent"
    android:layout_height="match_parent"
    tools:context=".MainActivity"
    >

    <Button
        android:id="@+id/b"
        android:layout_width="wrap_content"
        android:layout_height="wrap_content"
        android:text="スライドインさせるよー"
        android:layout_gravity="center_horizontal"
        android:layout_marginTop="50dp"
        />

    <LinearLayout
        android:id="@+id/ll"
        android:layout_width="200dp"
        android:layout_height="50dp"
        android:orientation="vertical"
        android:background="#888888"
        >

    </LinearLayout>

</FrameLayout>
スライドイン対象のViewはあらかじめ見えないようにしておく
スライドインさせるということはスライドイン対象のViewは最初は見えないようにしておく必要があります。その場合には以下のようにgravityにbottomを指定し、marginBottomに-(Viewの高さ)を指定することで、Acitivity開始時には見えないようにすることができます。
<?xml version="1.0" encoding="utf-8"?>
<LinearLayout
    android:id="@+id/ll"
    android:layout_width="200dp"
    android:layout_height="50dp"
    android:orientation="vertical"
    android:background="#888888"
    android:layout_gravity="center_horizontal|bottom"
    android:layout_marginBottom="-50dp"
    >

    <!-- content -->

</LinerLayout>
位置を変更するアニメーションを使用する
最後に位置を変更するアニメーションを使用して、実際にスライドインを実装しましょう。位置変更のアニメーションを実装するにはTraslateAnimationを使用します。
以下に例を示します。
LinearLayout view = findViewById(R.id.ll);
TranslateAnimation ta = new TranslateAnimation(0, 0, 0, -view.getHeight()*2);
ta.setDuration(500);
ta.setFillAfter(true);
view.startAnimation(ta);1行目
Viewを取得しているだけなので詳しい説明は割愛します。2行目
TraslateAnimationオブジェクトを生成します。コンストラクタの引数は以下です。
- [1つ目] fromXDelta: アニメーション開始時の相対X位置(px)
- [2つ目] ToXDelta: アニメーション終了時の相対X位置(px)
- [3つ目] fromYDelta: アニメーション開始時の相対Y位置(px)
- [4つ目] ToYDelta: アニメーション終了時の相対Y位置(px)
各引数の単位はpxなので注意する必要がありますが、view.getHeight()でviewの高さを取得すれば、あまり意識する必要はありません。
3行目
アニメーションの実行時間をmsec単位で指定します。スピードを早くしたい場合は小さい値を指定すればよいでしょう。
4行目
setFillAfterの引数をtrueにすることでアニメーション終了後もその位置で留まらせることができます。逆に指定し忘れるとアニメーション開始時の位置へ戻ってしまうので注意しましょう。
5行目
最後にアニメーションを実行させます。実装例
ここまでの説明を例にしたコードを以下に記載します。このコードではボタンを押すとLinearLayoutがスライドインします。
activity_Main.xml
<?xml version="1.0" encoding="utf-8"?>
<FrameLayout
    xmlns:android="http://schemas.android.com/apk/res/android"
    xmlns:app="http://schemas.android.com/apk/res-auto"
    xmlns:tools="http://schemas.android.com/tools"
    android:layout_width="match_parent"
    android:layout_height="match_parent"
    tools:context=".MainActivity"
    >

    <Button
        android:id="@+id/b"
        android:layout_width="wrap_content"
        android:layout_height="wrap_content"
        android:text="スライドインさせるよー"
        android:layout_gravity="center_horizontal"
        android:layout_marginTop="50dp"
        />

    <LinearLayout
        android:id="@+id/ll"
        android:layout_width="200dp"
        android:layout_height="50dp"
        android:orientation="vertical"
        android:background="#888888"
        android:layout_gravity="center_horizontal|bottom"
        android:layout_marginBottom="-50dp"
        >

    </LinearLayout>

</FrameLayout>public class MainActivity extends AppCompatActivity {
@Override
protected void onCreate(Bundle savedInstanceState) {
super.onCreate(savedInstanceState);
setContentView(R.layout.activity_main);
findViewById(R.id.b).setOnClickListener(new View.OnClickListener() {
@Override
public void onClick(View v) {
LinearLayout view = findViewById(R.id.ll);
TranslateAnimation ta = new TranslateAnimation(0, 0, 0, -view.getHeight()*2);
ta.setDuration(500);
ta.setFillAfter(true);
view.startAnimation(ta);
}
});
}
}まとめ
この記事ではAndroidアプリ開発においてViewをスライドインさせる方法を紹介しました。AlertDialogなどのみを使用した単純な方法だけではなく、
スライドイン等の表現方法を使用することでアプリのUIはもっと良くすることができます。
是非、実践してみてはいかがでしょうか?